I really enjoy making baby gifts.
I used
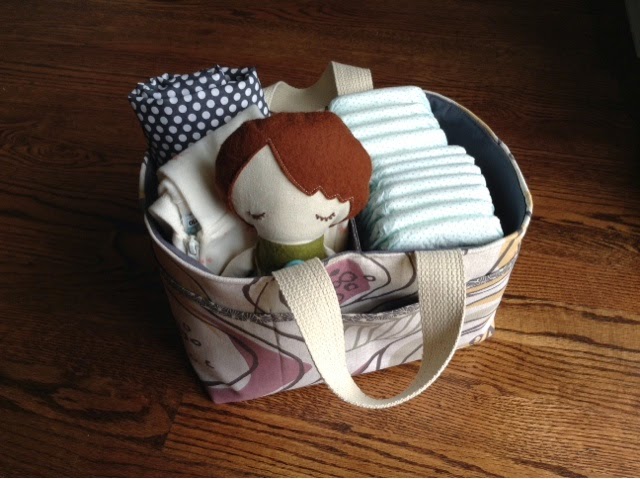
noodlehead's Divided Basket tutorial.
It's unique in the fact that you'll learn how to make two sections in the lining of the basket. I used Pellon Craft Bond for the lining interfacing and Fusible Fleece for the outer fabric. The basket is sturdy ....and stunning, IMHO. The lining fabrics are from JoAnns and the outer home dec fabric was found at a fabric depot in Williamsport, PA. The bias tape was a freebie from an
Etsy shop order. I love how the fabrics work together. The pocket on the front has three sections. Great for diaper cream, mommy's lip balm, etc. Needless to say, it was hard to give up this pretty little gender neutral basket. However, I know it will be very useful. It's great to have diapers and wipes handy when you're not in the baby room or you could keep it in the car. We keep ours in the living room since our baby's room is on another floor.
I'll share that one soon too.
By the way, you can make your very own
Build-a-Rag Doll (like the one in the basket) with metal cutting dies from
Clear & Simple Stamps. When you order it comes with a full How-to Tutorial that I wrote.
Base Dies,
Girl Dies,
Boy Dies.
xo steph


_1659_thumb.jpg)
_895_thumb.jpg)

_1210_thumb.jpg)
_873_thumb.jpg)
_652_thumb.jpg)


_1389_thumb.jpg)


