Showing posts with label home decor. Show all posts

Carnival Party

The invite. 
I had to use my little Emma Rag Doll stamp. She's sitting atop one of the first stamps I designed. That cute elephant. I made a fun carnival games background using one of the Rag Doll Shops

Party Favors!
I sewed a cinch bag up for each child that matches the decor and filled them with silly toys and goodies. Then I stuffed each one in a tin bucket with their initial on them. 

The Cake.
I discovered a fabulous cake decorator, Karen's Custom Cakes. The cake was darling and tasted so good! We have already ordered our next custom cake.

The creative games. 
I used what we had to make some games.

And I rented these real carnival games. They were a hit!

The Decor. 
Again, I used what I had.... I painted these unused framed pin boards and an old plaque that just happened to look like a ticket. I loved planning, decorating and entertaining at this party.

Here are some highlights from the party before the party.


Best party to date.

Thanks for stopping by,
Steph


Carnival Party Peek: Ticket Booth

As guests walk in the front door they are welcomed by the ticket master and
the kiddos can step right up to the mini ticket booth for their Carnival Tickets!


I used Mod Podge to attach tickets to an unused canvas then stenciled and
painted the letters directly on top. 


Each child received a party hat at the ticket booth.


To be continued.....

Carnival Party Peek


My baby girl just turned 2.

We hosted a little carnival party to celebrate.
I made a darling little reversible table cloth for the kid's table. 


Here's how I did it.

I grabbed a smallish plate from our kitchen cabinets to use as a template for the scalloped border. 


I gather all the fabrics I needed, stacked them up and traced the plate onto the top fabric. Then cut them all at once after pinning them together. 


I matched them in twos right sides facing the sewed them all the way around. No need to leave an opening for turning because I simply took the whole stack of sewn circles to the cutting mat and cut them in half with a rotary cutter. 


Then I top stitched the round section of each piece. 
Now we're ready to assemble!
I cut a two pieces of fabric the same size as the table. One in a solid and one in this fun multicolor dot fabric. 


During assembly I added a tie to each corner for two reasons. First so you can tie it to the table so it doesn't move around during playtime and secondly so the kids can use it as a fort blanket and tie it to anything. 


I sewed it up, turned it and top stitched. All done and it's so cute!


Baby girl approved.


Thanks for stopping by,
steph

oh hey, be sure to pop back in on Saturday so I can tell you all about those cute Rag Dolls on the table....


Rag Doll Home Decor


Collection 7 at Clear & Simple Stamps is full of new Rag Doll goodies. I mixed the old with the new in this fun photo tray. Today is Rag Doll Replay day at the CSS blog.


I love the new tea party series with it's little dollies! Now your Rag Doll can have his or her own dolly.
You can mix and match the tables and the cloths and of course all the goodies that can go on top.

I'll list all the stamps for each 'room':
Rag Doll Tea Party Extras
Tablescapes
Rag Doll House Shop (cake)
Playroom (banner)


This is the play room. Isn't it a mess? It reminds me of my living room right now... plush rag dolls everywhere. My kids love them, especially because there are so many. I made quite a few during the design process. You'll see more soon.

Rag Doll Tea Party Extras (rag dolls)
Rag Doll Scenes 2 (rocker)
Craft Room (shelf)
Taglines Uglies (ugly doll, sentiment on book)
Airmail (books)
Sweet Dreams (open book)
Party Elements Baby (picture frame)
Lowercase Dies (e)
Cart Pals Baby (duck, baby toys)
Shower Sentiments (elephant bookends)


I can't get enough of the scenes you can make. This was fun to color. I colored all of these scenes with watercolors and a brush... going back to my roots. It was so darn fun!!

Rag Doll Emma ROFL (sitting rag doll)
Rag Doll Scenes 3 (tree swing, stump)
Taglines Little Critters (branch)
Rag Doll Tea Party Extras (bunny)
Fall Frenzy (sunflowers)
Rag Doll Scenes 2 (background scene)

One day I will make time for the other 3 rooms in this photo tray.

Check out the other designers blogs for more Rag Doll Replays.....
LORI | AUDREY | ELENA


Thanks for stopping by,
steph

DIY Stamped Fabric

I am a little obsessed with fabric these days. As a designer I am so anxious to design my own fabrics but printing your own fabric designs is so expensive. Then I realized I had everything I needed right here in my craft room!
1) light colored cotton fabric (found in JoAnn's Fabrics remnant bins for 50% off)
2) cute stamps (bonus: I designed them)
3) pigment craft ink (from Clear & Simple Stamps)

I used two stamp sets from Clear & Simple Stamps: Apothecary Sweets and Apothecary Holidays.


Apothecary: Holidays

 Once I was finished stamping the fabric I scoured my Pinterest Sewing Board for a project. I thought this Fabric Tray Tutorial was perfect!


Thanks for stopping by,
steph

New Color Makeover

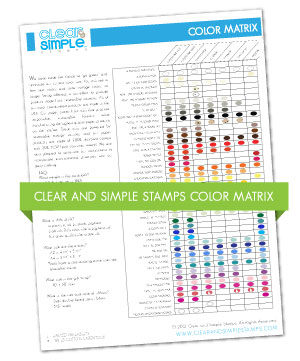
Hi folks! I wanted to share the news about Clear & Simple Stamps new line of colored cardstock, coordinating envies, matching ink, buttons, ribbon, gift wrap and tissue!!

CSS Color Matrix
Download the new color chart here!

I finally have some gift wrap worthy of filling my old crafting cabinet. There are dowels in this thing just for gift wrap! They used to hold contact paper (that I used once) and ribbon.

Now she's a shipping/wrapping station!

Side note:
Have you ordered a trio of twine yet from Clear & Simple Stamps? I can't wait to use mine up so I can make something with this chipboard shape. Love it!


 I had to make a swatch book of new cardstock, I used my favorite tag, Tags 2. I will eventually die cut all the colors! ;)


Oh, but there's more....


 Clear & Simple Stamps is also releasing envelope liner dies (A2 and A4) to match.
I used one here using pattern paper and the new envies! I'll write recipe cards for the holidays.


Be sure to check out even more at Clear & Simple Stamps and the design team's blogs.
Dana
Debby (Guest Designer)
Denise
Elena
Jaclyn
Jennifer
Kim
Laura
Laurie
Lori
Tracy
Clear & Simple Stamps
Thanks for stopping by,
steph

Collection 5 Day 3

Are you ready for day 3 of Clear & Simple Stamps Collection 5 Release? I am so excited to show you this next series. We lovingly call them UGLIES. They are little monsters that are so ugly that they are CUTE!

EEK.... isn't it purdy?!
I could not wait to paper piece this little cutie. You'll find it in a set called Little Uglies.... like our Little Critters, get it? Really, the series is almost identical. There is a Taglines set, which is great for tags... ;)  and there are builder dies, they are large, and then medium dies that go with this size stamp. So FUN!
I nice little close up is always fun! But the best part is that you can make these Uglies come to life..... with a little work....
 
Actually, this plush Ugly came alive long before this stamp set. My sister and I drew and then made these stuffed cuties together. My sister helped me transition from sewing paper to sewing fabric.... what?!! I never thought I'd go that far with it. LOL. This UGLY inspired the entire Uglies series.

Here is the back. Complete with a dragon like back and tail.

Thanks sis for showing me the light!!!


Okay, now one more little project....
This little guy here is a Thank You card for my kiddo to send to someone special. Today is his 5th birthday, so he'll be in need of it real soon. ;)

I went with a much more simple design for this card. I used my Copic markers to color the eye and teeth, along with all the number fives on the pattern paper. How easy would this be to bring to life. Maybe it will be my next sewing project!

Here are the sets being released.....


Thanks for stopping by,
steph


Now, check out the rest of the series starting here: Clear & Simple Stamps.


Handmade appliqué blanket

Every school bound 4 year old needs a cool monogrammed blanket for preschool.
I used the Baby Shower dies, Large Baby Shower dies and Uppercase Alpha dies from Clear & Simple Stamps.

Here is the happy preschooler. He helped pick out the fabrics and he said when it was done, "WOW, this is great, Mommy! I am gonna wear it all day and all night."

Below is a scrap piece of fabric leftover from a bib.... will share soon.
I have to use every scrap! ;)

LinkWithin

Related Posts with Thumbnails