Showing posts with label tutorial. Show all posts

Back-to-School project with Rag Doll Scenes


My son just started Kindergarten and now needs to take lunch money to school. I couldn't just send him off with a blank envelope, it had to be decorated. In the photos you'll see Rag Doll Chloe as the star pupil. 

Do yourself a favor and make masks for all of your Rag Dolls. It's so fun to make a scene for whatever occasion you need. Masking your stamps ahead of time will save you some of that creative energy! Ya know, for the fun stuff .....stamping, masking and coloring!

Here's how I made the lunch money envie and a matching card for the lucky recipient to one day give to her teacher. 


I used colored pencils in this project. I have memories of high school art class. We would first color the image with marker then colored pencils. It was a great look. Everything looked so rich. Try it.


How about that ombre lettering? The new Rag Doll Teacher's Notes set has so many great teacher sentiments plus this big Teacher with stitched lines that matches the Rag Dolls. Love that!
You'll find the chalk hopscotch and flower in grass in Rag Doll Scenes 1.


I used the same technique with the money envie. I added a cute banner from Banner Flags 3 and stamped 'Color Me' using two other stamps.  The word 'Color' is from Rag Doll Emma Color and 'ME' is from Happy Leaning Rag Doll Emma. The recipient can enjoy coloring this before class.


Here's a few more. I had a little assembly line going for both projects. 


Check out the Clear & Simple Stamps blog tomorrow for the next fun how-to project. 


Thanks for stopping by,
Steph

Build-a-Rag Doll: How To

Today I want to share how I assemble the Build-a-Rag Doll I designed for Clear & Simple Stamps.
For a limited time these dies come with a kit filled with the fabric and felt you will need to make your very own plush Rag Doll.


I designed an apple and pear fabric for your doll's dress and a cute stripe for the leggings.

I took a ton of photos and made two little movies out of them..... Or you can see the lite version in this post.

Rag Doll Assembly picture video.
Rag Doll Assembly 2 


First, I cut the dress fabric to fit my die cutter. It's six inches wide. The dress die fits perfectly in that space.


Cut two of everything basically. Each die set comes with complete detailed instructions.
Pin and sew.


Remember right sides together when sewing the limbs. 


Turn and stuff the limbs.


Sew the limbs in place.


With right sides facing, place the back on the front keeping the arms inside and the legs out.


Sew and turn.


Stuff the doll quite firm.


Pin and sew the opening shut.


And you're done!


Here are both a boy and a girl limited edition kit. Aren't they lovely?!


Get your very own Build-a-Rag Doll kit today while supplies last.


Thanks for stopping by,
Steph

How to: Sheer Flowers

 Hi folks!
I frequent a little thrift shop now and then and came upon a couple Sheers.... curtains for a dollar. I originally wanted them to do a screen printing project (which I should show you).

After that project I had a ton leftover so....

I cut different size circles with my Big Shot.
3 layers at a time.
Then I held a lighter under the edges of each circle to give them 
texture and drama.

 Then I took one of each size to make a single flower.

 Punched a whole.

 Added a lovely brad.

Brushed a little Elmer's glue on the edges and 
dipped them in sugar..... just kidding... glitter.

Aren't they delicious?

Let me remind you that these were made from thrift store sheers!
So cool and crafty .... and cheap!

Beary Well stamp set project

Today I want to share a little 'Get Well' Box with Handle 
that I made for the Diecut Diva Blog.

It's super easy to assemble and you can get it in any color you need from Creative Cuts & More. I used one little strip of Killer Red Tacky Tape to hold the box together. I filled it with little candies and adorned the outside with a stick of Smarties that is held in place by the little banner, see close up below.

I did some paper piecing with 
Clear & Simple Stamps  'Beary Well' stamp set! 
 
I think it looks awesome!

I also made this scalloped border by cutting apart this  
Scallop Rectangle Frame-Large from Creative Cuts & More.

Here's how I did it....

Supplies.

First, I added a little strip of Killer Red Tacky Tape right to the box.
Then placed the frame right on top and snipped the excess.

Here's a cool way to use the 'index page' from 
Cosmo Cricket's Crafting kits.
This is the Cogsmo Crafting Kit.

I stamped the image in most of the 'index' squares then cut the pieces I needed.

The mixing and matching of the pillow was fun!! 

 . . . . . . . . . .
I ended up making a couple of these. 
You can see the other one if you have an iPhone, iPod, or iPad,
in the future, through Clear & Simple Stamps 
daily papercrafting iPhone app.

September Blog Hop: Creative Cuts & More

Hey Blog Hoppers!
Wasn't Ellen's post amazing?

If this is your first stop along the BLOG HOP,
START HERE
at the Die Cut Diva Blog

you don't want to miss what the entire
Creative Cuts & More Design Team has in store for you!

There will be a 15% coupon code
for anyone who visits the Die Cut Diva blog.

Creative Cuts & More has some awesome die cuts for the holidays.
These are their Coffin Boxes. Aren't they darling?
Be sure to get your 15% off code at their blog: Die Cut Divas.

Now here's a MINI TUTORIAL on how to use that spider Tacky Tape die cut.
I am using Crushed Velvet beetle black FLOCK here.


Peel the top layer to reveal the tacky tape.

Then add your flock ....or glitter ....or paper.
Tap off the excess, remove the backing and adhere to project.
It's that easy!

Below is how I made the layers of the next coffin box to look like an eye using punches.

Layer 1.

Layer 2.

Layer 3.

I wanted to make sure this textured paper would stay on the coffin box so I used two sizes of Killer Red Tacky Tape. I love this stuff.

This is the entire set of Coffin Boxes I made for this Hallows Eve!
If you missed the post about the other two boxes go HERE.

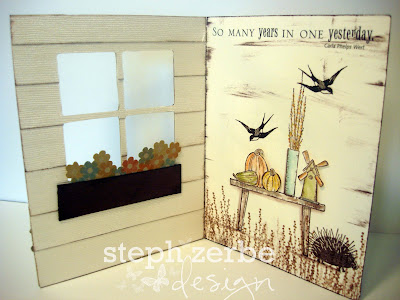
Have you tried your hand at a window card yet?
This is my first and WHAT FUN!!


Shimmery siding.


Stop by Lindsay's blog next. Here's the Blog Hop order.....


Supplies:
Die cuts: Creative Cuts & More
Adhesive: Killer Red Tacky Tape
Rub ons: October Afternoon, Cloud 9
Stamps/Pattern Papers/Hardware Frame: SU!

LinkWithin

Related Posts with Thumbnails